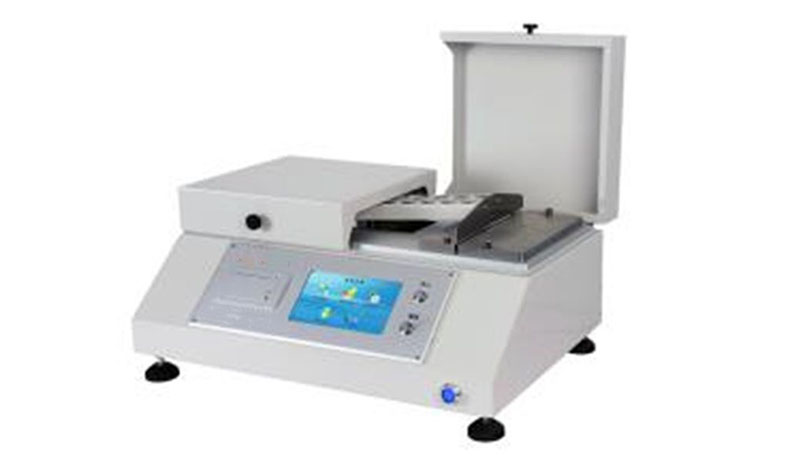
Softness is the vector of the sample’s bending resistance and friction force when pressed into a split towel to a specific depth under standard conditions (units of force are expressed in mN). Smaller values soften samples.
The paper softness tester may measure paper towels, toilet paper, wet tissue, tobacco sheets, sanitary items, and more. It uses microcomputer control and a touch screen to automatically display the experiment’s curve, making it easy to use and accurate. Used in papermaking, sanitary goods, cigarettes, and quality inspection.
Test principle
When the plate-shaped probe of the softness instrument presses the sample into the gap to a certain depth (about 8 mm), the sum of the sample’s bending resistance and the largest vector of the friction force between the sample and the gap is called softness. The lower the softness value, the softer the sample.
Factors influencing clean paper softness
The softness index is vital in making clean paper. Industrial dust-free paper’s softness depends on its stiffness and surface friction. Customers want soft paper, too. Clean paper softness is affected by:
Fluff pulp factor
The rougher the fluff pulp fiber, the larger the stiffness, the greater the surface friction of the finished paper sheet, and the lower the paper sheet softness; sulfite pulp is often preferred over sulfate pulp. Softer pulp is better; semi-or fully-treated fluff pulp is better than untreated. Factors affecting clean paper’s softness index
It also affects fine fiber retention when formed. When fine fibers are kept, the paper sheet is thicker and softer. When hot pressing pressure is high, the sheet is tighter and softer.
Adhesive factor
1. The dust-free paper must be made with a special latex, and it feels good in the hand. When some domestic VAF latex dries, the top of the paper sheet is hard, nd it has very little softness.
2. Dosage: As long as the strength is guaranteed, the less latex used, the better. This not only makes the product softer, but it also makes it cheaper.
3. Placement on the sheet of paper: For example, when the glue is sprayed, it is evenly spread on the inner and outer layers of the whole paper web, and the softness is good. If the glue is spread more on the two surfaces, the surface of the paper sheet will be rough and hard, and the softness will drop sharply.
How to measure paper softness?
Instrument parameters and inspection:
1. Slit width
- The instrument testing slit width should be divided into four grades: 5.0 mm, 6.35 mm, 10.0 mm, and 20.0 mm, and the width error cannot exceed ±0.05 mm.
- Slot width and width error and parallelism of both sides are checked with vernier calipers (graduation is 0.02 mm) to measure the width of both ends and the middle of the slit. The average value of the measured values at the three positions is the actual slit width, which is the same as the slit width. The difference between the nominal widths should be less than ±0.05 mm, and the difference between the largest z value and the smallest z value among the three measured values is the parallelism error value.
2. Dimensions of the plate probe
- Length 225 mm; thickness 2 mm; edge arc radius 1 mn.
3. The average travel speed and total stroke of the probe
(1) Average travel speed and total travel range of the probe, average travel speed (1.2±0.24) mm/s; total travel (12±0.5) nm.
(2) Check the total stroke and average travel speed of the measuring head
- First open the probe to the z-high position of the stroke, measure the height h1 from the upper end face to the table with a height gauge, then lower the probe to the z-low position of the stroke, measure the height h2 between the upper end face and the table, then the total stroke (mm ) is: H=h1-h2
- Use a stopwatch to measure the time it takes for the probe to travel from the high z position to the low z position, accurate to 0.01s, expressed in t, then the average travel speed (mm/s) is: V=H/t
4. Press into the slit depth
- The indentation depth should be 8mm.
- Inspect the depth of pressing into the slit. Use vernier calipers to measure the height B of the plate probe itself, and the pressing depth is: K=H-(h1-B)
5. Instrument Accuracy
- The maximum range of the instrument is 1000 mN: the load accuracy is less than ±3%; the reproducibility is less than ±3%.
- Inspection of instrument accuracy. Adjust the zero point of the instrument, and install the special pulley frame according to Figure 8-15, hang the 40 g silicon code, and then install the 10 g, 20 g, 40 g, 60 g, 80 g weights in sequence, or measure in the plate shape. Add brick code directly on the head, repeat the above procedure three times, and get three sets of measured values.
6. Probe to neutral
- After the probe enters the slit, the probe should be symmetrical with respect to both sides of the slit, and the symmetry should be less than 0.05 mm
- The probe is checked for neutrality. The special gauge is placed in the slit of the test bench, the probe moves from top to bottom, and the plate-shaped probe can easily fall into the middle of the gauge groove is qualified.
7. The parallelism of the seam should not exceed 0.05 mm.
8. Specimen collection, preparation and handling
- According to standard methods to take samples and process samples, and tested in standard conditions.
- Cut the material into 100 mm x 100 mm square test pieces and label them with vertical and horizontal directions. The dimensional deviation in each direction is 0.5 mm.
- After preheating according to the handbook, turn on the power and set the zero point and slit width.
- Make the sample symmetrical to the slit on the test bench. Stack the multilayer samples. Increase the volume! Tracking switch to peak, start button pressed, and probe moves. After it’s done, read the display and take the next sample. 10 vertical and horizontal data points are measured, but not the sample.
9. Calculation of test results
The average softness is expressed in mN, calculated by the following formula, accurate to one decimal place.
Leather Softness Tester
The Leather Softness Tester can be used to measure the softness of leather and animal skin to see if the softness and hardness of the same batch of leather are uniform, or the difference in softness of each part of the whole piece of leather. Accurate, beautiful, easy to operate and maintain, and portable.
How to perform the leather softness test?
Steps:
The calibration disc must be used to return the dial A to zero and down, squeeze the handle B lightly, and pull the upper arm release button C to the outside so the arm can bounce up. Place the zero calibration disc on the test seat and press handle B until the upper arm locks. Now, dial A points to “0.” If not, turn dial A to “0.”
Test:
After the upper arm pops up, remove the zero-returning circular plate, place the test leather on the test seat, bend the pressing handle to fully retract the probe, and then press down until the leather is clamped by the clamp seat and the upper arm D is locked. When you hear a sound, the dial pointer will indicate the leather’s softness index and record the value. Remove the test piece after releasing the upper arm. Calculate using the dial’s mm.
The sample’s softness is tested more than three times to assure accuracy. Three test points were averaged. The larger the dial on the leather softness tester, the softer the leather.